Install engineered hardwood floor effortlessly with this easy-to-follow guide. Engineered wood flooring combines the beauty of solid hardwood with improved stability and versatility, perfect for both DIY enthusiasts and professional installers. Here’s a quick rundown of how to get started:
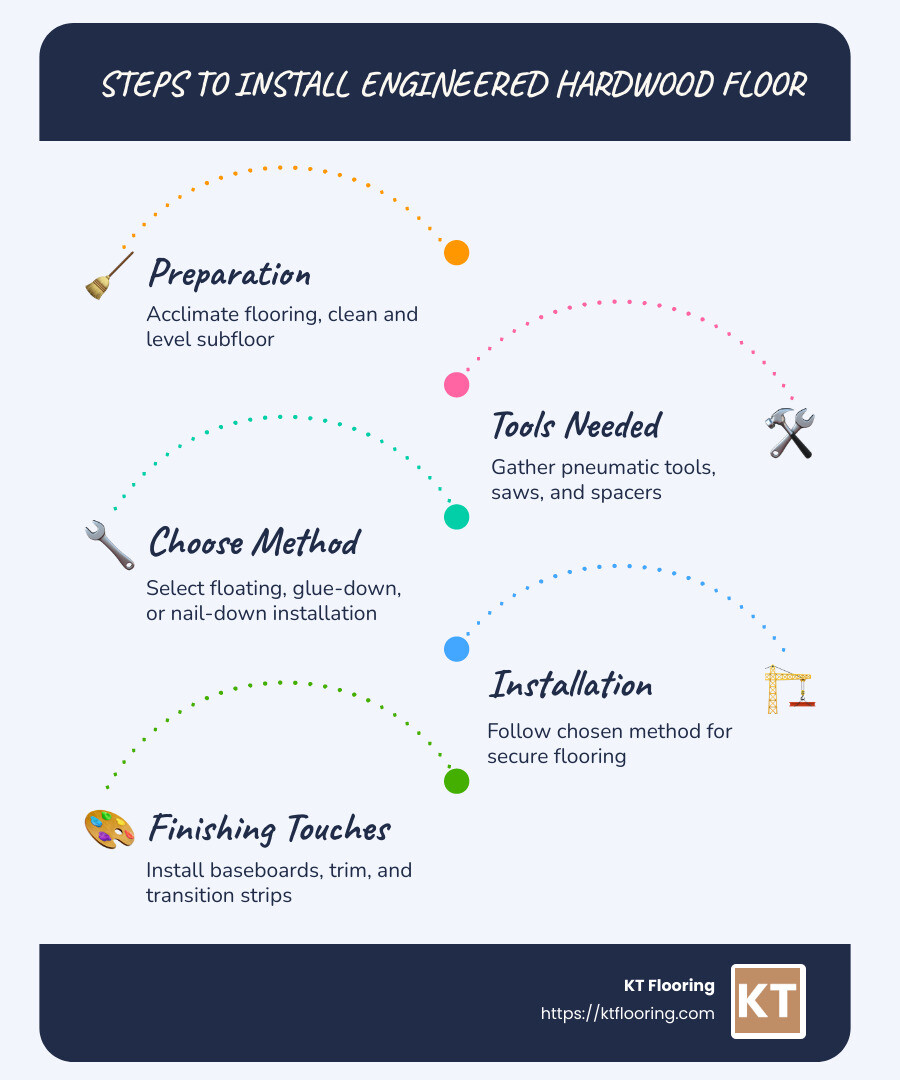
- Preparation: Acclimate flooring, clean and level subfloor
- Tools Needed: Pneumatic tools, saws, spacers
- Installation Methods: Floating, glue-down, or nail-down
- Finishing Touches: Baseboards, trim, transition strips
Engineered hardwood provides a durable and stylish update for any home. Its affordability and ease of installation make it a popular choice among homeowners looking to improve their space without breaking the bank.
My name is Christopher Talty, owner of KT Flooring, where we’ve been delivering exceptional flooring solutions in New Hampshire and Northeast Massachusetts since 1974. With over 50 years of experience in helping clients install engineered hardwood floor, I ensure you get the best guidance and support for a successful installation.
Understanding Engineered Hardwood
Benefits of Engineered Hardwood
Engineered hardwood is a fantastic choice for anyone looking to upgrade their flooring. It combines the natural beauty of wood with modern engineering techniques, offering several key benefits:
Construction and Stability
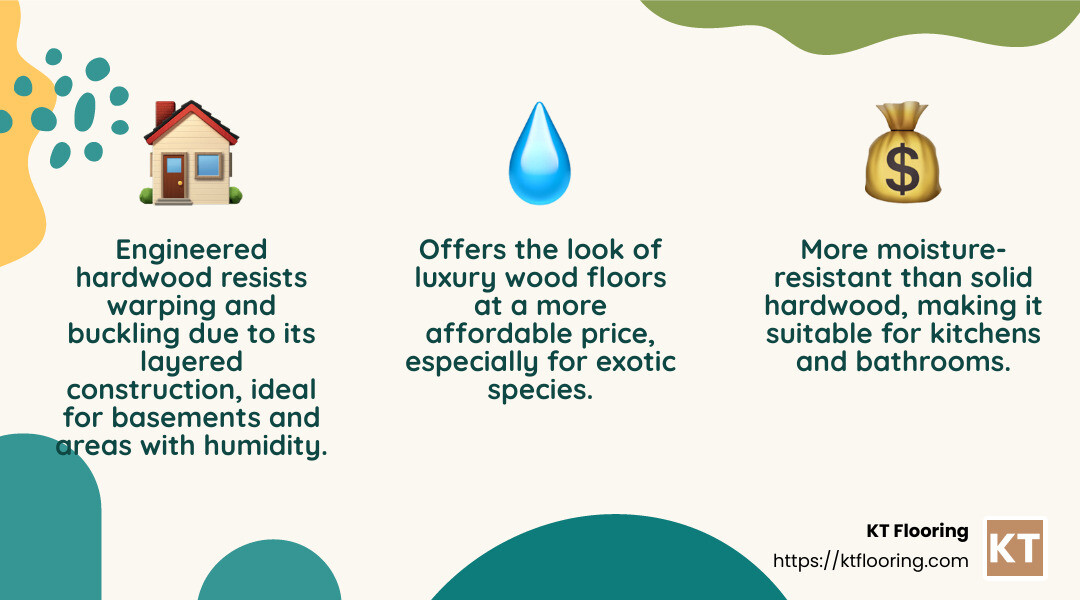
Engineered hardwood is made from layers of real wood compressed together. This layered construction gives it greater stability compared to solid hardwood. It resists warping and buckling, making it ideal for areas with fluctuating humidity and temperature, like basements or over radiant heating systems.
Thanks to its unique construction, engineered hardwood is more resistant to moisture than traditional hardwood. This makes it suitable for spaces where moisture might be a concern, such as kitchens and bathrooms.
Affordability
While prices can vary based on species and quality, engineered hardwood is often more affordable than solid hardwood. According to average internet data, prices can range widely, with the high end being at least 3x the average pricing. This is particularly true for exotic wood species, where engineered options provide the look and feel of luxury without the hefty price tag.
Durability
High-quality engineered hardwood can last for decades with proper care. Its durability makes it a smart investment for high-traffic areas in both homes and commercial spaces.
Versatility
One of the standout features of engineered hardwood is its versatility. It can be installed over a variety of subfloors using different methods, such as floating, glue-down, or nail-down techniques. This flexibility allows for easy installation in a wide range of environments.
These benefits make engineered hardwood a popular choice among homeowners and professionals alike. Its combination of beauty, durability, and versatility ensures that it fits seamlessly into any design style, from traditional to modern. Whether you’re a DIY enthusiast or prefer professional installation, engineered hardwood provides an excellent solution for enhancing your space.
Preparing for Installation
Before you install engineered hardwood floor, preparation is key. This step ensures a smooth installation and a beautiful, long-lasting finish.
Essential Tools and Materials
Gathering the right tools and materials is a vital first step. Here’s a checklist to help you get started:
Tools:
- Pneumatic Tools: Pneumatic flooring nailers and staplers are essential for nail-down or staple-down methods. They provide the power needed to secure planks efficiently.
- Saw Options: You’ll need a circular saw, miter saw, or table saw for cutting planks to size.
- Safety Gear: Always wear safety glasses, work gloves, and knee pads to protect yourself during the installation.
Materials:
- Underlayment: This is crucial for floating floors. It provides a moisture barrier and helps reduce noise.
- Spacers and Tapping Block: These maintain the necessary expansion gaps and ensure planks fit snugly together.
- Wood Glue: Necessary for the glue-down method, ensuring a strong bond to the subfloor.
Acclimating Your Flooring
Acclimation is crucial to avoid future issues like gaps or buckling. Here’s how to do it right:
- Humidity Control: Ensure the room’s humidity is stable. Engineered hardwood thrives in environments with 30-50% humidity.
- Acclimation Time: Allow the flooring to sit in the installation room for at least three days. Open the boxes and spread out the planks to let them adjust to the room’s conditions.
Subfloor Preparation
A clean, dry, and level subfloor is essential for a successful installation. Follow these steps:
- Cleaning: Remove any debris, dust, or old adhesive.
- Leveling: Use a level to check for any uneven areas. If needed, sand down high spots or fill low areas with a leveling compound.
- Moisture Barrier: For concrete subfloors, apply a vapor barrier to prevent moisture from seeping into the wood.
By preparing your tools, materials, and environment, you’ll set the stage for a successful installation. With these steps complete, you’re ready to start laying down your engineered hardwood floors.
How to Install Engineered Hardwood Floor
When you decide to install engineered hardwood floor, choosing the right installation method is essential. The method you select depends on your subfloor type and personal preference. Let’s explore the options.
Floating Installation Method
Floating installation is popular among DIY enthusiasts because of its ease and versatility. In this method, planks are not attached to the subfloor. Instead, they connect to each other, creating a “floating” surface.
- Ease of Installation: This method is straightforward and doesn’t require nails or glue. Simply click the planks together.
- Expansion Gaps: Use spacers to maintain a 1/2-inch expansion gap around the room’s perimeter. This allows the floor to expand and contract with changes in humidity.
- Subfloor Compatibility: Suitable for various subfloor types, including concrete and plywood. Just ensure the subfloor is clean and level.
Glue-Down Installation Method
For those looking for a stable and solid floor, the glue-down method is ideal. This method involves adhering the planks directly to the subfloor using a special adhesive.
- Stability: Offers a firm and stable feel underfoot, reducing noise and movement.
- Adhesive Application: Use a notched trowel to apply glue evenly. Wear cleaning gloves to protect your hands.
- Subfloor Requirements: Best for concrete subfloors. Ensure the surface is dry and free of dust before applying adhesive.
Nail-Down Installation Method
The nail-down method is a classic choice for wood subfloors. It involves securing the planks with nails or staples.
- Wood Subfloors: This method is only suitable for wooden subfloors. It provides a strong hold and is great for thicker engineered planks.
- Fastening Tools: You’ll need a pneumatic flooring nailer or stapler. These tools make the process quicker and ensure a secure fit.
- DIY Tips: If you’re familiar with traditional hardwood installation, this method will be a breeze. Just make sure to follow the manufacturer’s instructions closely.
Each method has its pros and cons. Consider your subfloor type, skill level, and desired stability when choosing the best method for your project. Once you’ve selected your installation method, you’re ready to move forward with your engineered hardwood installation journey.
Troubleshooting Common Installation Issues
Even the best-laid plans can encounter hiccups. When you install engineered hardwood floor, it’s important to know how to address common issues like gaps, buckling, and squeaks.
Gaps and Buckling
Gaps and buckling in your flooring can be frustrating, but they’re often solvable. These issues usually arise from changes in humidity or improper installation. Here’s how you can tackle them:
- Gaps Between Planks: Small gaps can be filled with a wood filler that matches your floor color. For larger gaps, you might need to reinstall the affected planks. Ensure you leave proper expansion gaps during installation to prevent this issue.
- Buckling: Significant buckling often requires removing and reinstalling planks. Check that you’ve left enough space for expansion. Maintaining consistent indoor humidity (between 30%–50%) can prevent future buckling.
Tip: Use a hygrometer to monitor indoor humidity levels. Keeping these consistent can save you from future flooring headaches.
Squeaks and Creaks
Squeaky floors can be annoying, but they’re usually easy to fix. The source of the squeak is often where planks rub against each other or the subfloor.
- Floating Floors: Sprinkle talcum powder between the planks to reduce friction. This is a simple fix that often works wonders.
- Nail-Down Installations: If your floor is nailed down, try driving additional nails into the subfloor where the squeak occurs. This can help secure loose planks and eliminate noise.
Expert Tip: Always walk around your floor to locate the exact source of the squeak before attempting any fixes.
By addressing these issues promptly, you can ensure your engineered hardwood floor remains beautiful and functional. With proper maintenance, these floors can last for years to come.
Next, we’ll dive into the essential maintenance and care tips to keep your engineered hardwood looking its best.
Maintenance and Care for Engineered Hardwood Floors
Keeping your engineered hardwood floors in top shape doesn’t have to be a chore. With a little daily attention and strategic long-term care, your floors will stay beautiful for years.
Daily Cleaning Tips
Spill Management: Accidents happen, but quick action can prevent stains and water damage. Wipe up spills immediately with a soft cloth.
Vacuuming and Sweeping: Regularly sweep or vacuum your floors to remove dirt and debris. Use a soft-bristle vacuum attachment to avoid scratching.
Mopping: For a deeper clean, use a slightly damp mop. Avoid soaking the floor, as excess water can damage the wood. Stick to cleaning solutions specifically designed for engineered wood.
Pro Tip: Use felt pads under furniture legs to prevent scratches and make cleaning easier.
Long-Term Preservation Strategies
Refinishing: Depending on wear and tear, consider professional refinishing every five to ten years. This can refresh the look of your floors and extend their life.
Humidity Levels: Consistent indoor humidity is crucial. Aim to keep levels between 30%–50% to minimize wood expansion and contraction. A hygrometer can help you monitor this.
Area Rugs: Place rugs in high-traffic areas to reduce wear. Rotate them periodically to avoid uneven fading.
Extra Tip: Keep pet nails trimmed to minimize scratches. This simple step can make a big difference in preserving your floor’s finish.
By following these tips, you can maintain the elegance and durability of your engineered hardwood floors. Next, we’ll answer some frequently asked questions about installation and care.
Frequently Asked Questions about Engineered Hardwood Installation
Do you need to put anything under engineered wood flooring?
Yes, underlayment is often recommended when you install engineered hardwood floor. It acts as a cushion, reducing noise and providing a smoother surface for the flooring. For installations over concrete, a moisture barrier is crucial to prevent water damage. This barrier helps keep moisture from seeping into the wood, which can cause warping or buckling.
Is it better to glue or float an engineered wood floor?
The choice between glue-down and floating methods depends on your priorities. Floating floors are popular for their ease of installation. They use a click-lock system that doesn’t require adhesives, making them a great option for DIY projects. This method allows the floor to “float” above the subfloor, which can be useful in areas with slight imperfections.
On the other hand, glue-down installations offer more stability and are less likely to shift over time. This method is ideal for rooms where a solid feel underfoot is desired. However, it requires more time and skill to apply the adhesive properly.
Can I install engineered hardwood myself?
Absolutely! Installing engineered hardwood floors is a feasible project for many DIY enthusiasts. Here are a few tips to get you started:
- Preparation is Key: Make sure your subfloor is clean, dry, and level. This will set the stage for a successful installation.
- Acclimate Your Flooring: Allow the planks to sit in the room for a few days before installation. This helps them adjust to the room’s temperature and humidity.
- Choose the Right Method: Depending on your skill level, choose between floating, glue-down, or nail-down methods. Floating floors are often the easiest for beginners.
- Gather Essential Tools: Have all necessary tools ready, like a tape measure, saw, and spacers. This will keep the process smooth and efficient.
With these pointers, you can confidently tackle your flooring project. If you prefer professional help, KT Flooring offers expert installation services to ensure a flawless finish.
Conclusion
At KT Flooring, we understand the importance of a well-installed floor. Engineered hardwood floors offer a blend of beauty and durability, making them a popular choice for many homeowners. While DIY installation is achievable, professional installation can ensure the best results, especially for those who want to avoid potential pitfalls.
With over 50 years of experience, our team of highly qualified installers is dedicated to delivering top-notch service and craftsmanship. We take pride in our attention to detail, ensuring that every floor we install not only looks stunning but also stands the test of time. Our commitment to quality and customer satisfaction is reflected in the positive feedback we receive from our clients across New Hampshire and Northeast Massachusetts.
Whether you’re looking to install engineered hardwood floor yourself or prefer the assurance of professional installation, KT Flooring is here to help. We offer free in-home consultations to assess your needs and provide personalized solutions. Our extensive range of top industry brands guarantees you’ll find the perfect match for your space.
If you’re ready to transform your home with the timeless elegance of hardwood flooring, contact KT Flooring today. Let our expertise and dedication to quality bring your flooring vision to life. Your satisfaction is our top priority, and we’re committed to making your flooring project a success.
