Changing Concrete into a Warm, Beautiful Space
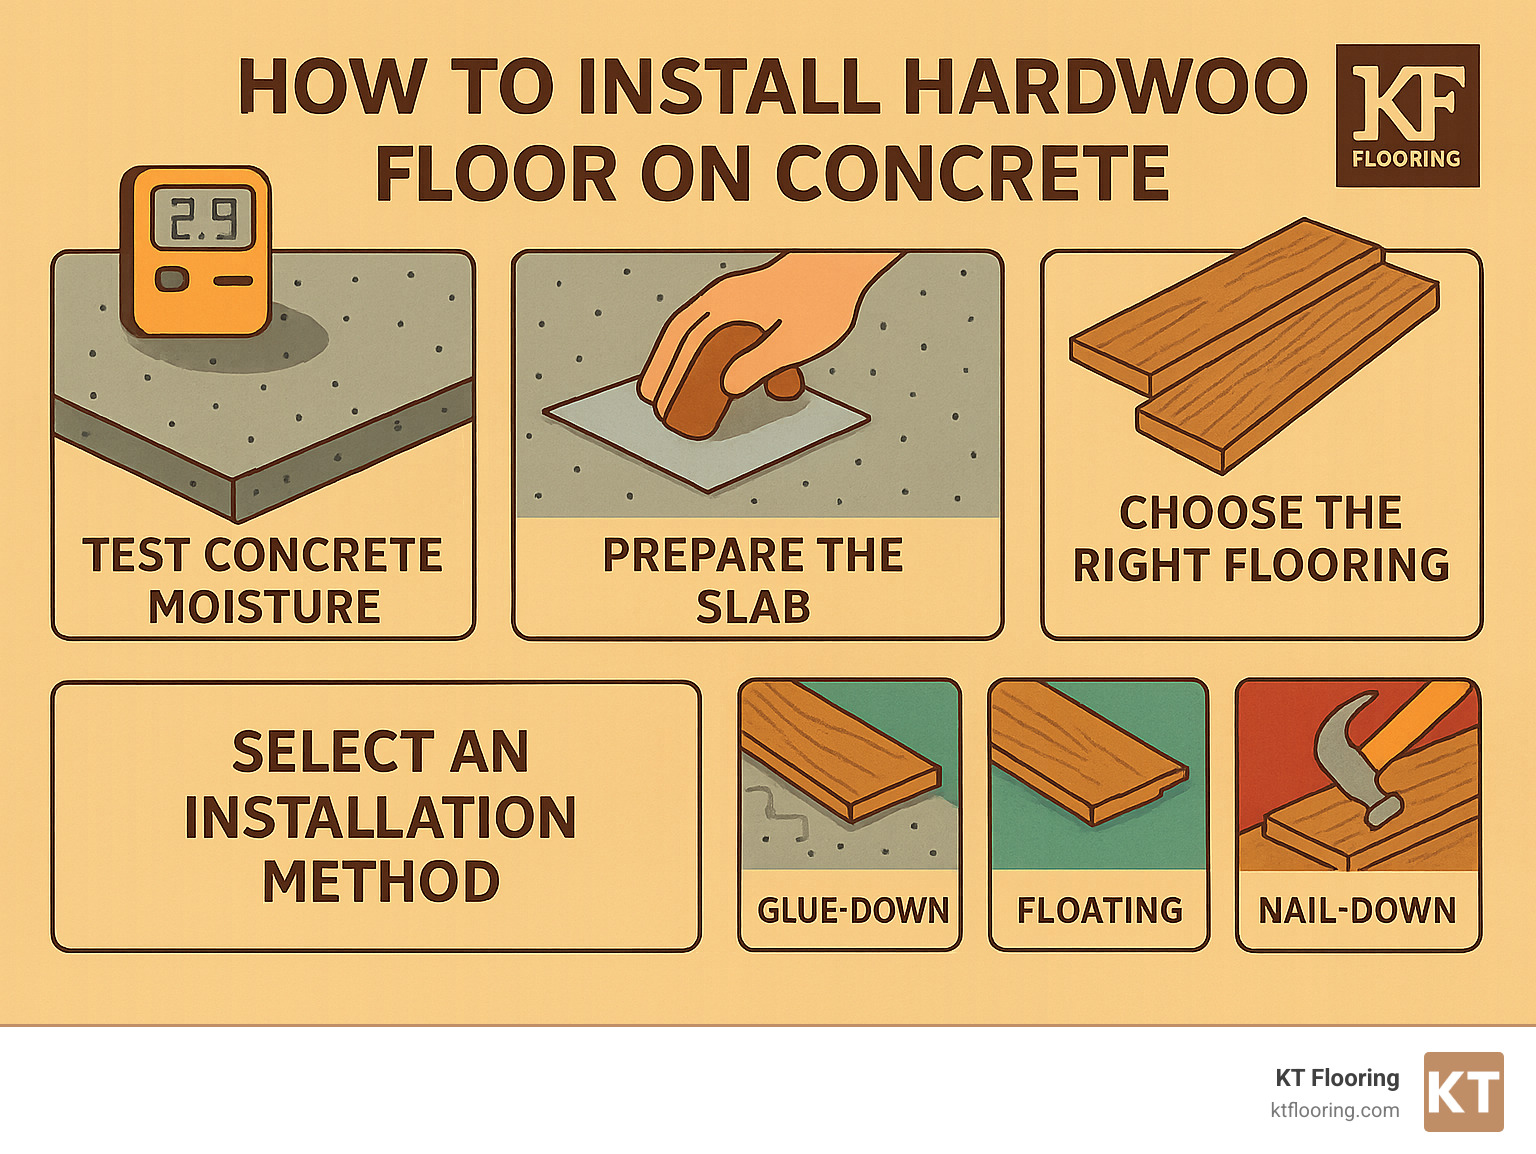
To install hardwood floor on concrete, follow these key steps:
- Test concrete moisture (should be under 3 lbs/1000 sq.ft./24h)
- Prepare the slab (level to within 3/16″ over 10 ft)
- Install a moisture barrier (6-mil polyethylene or specialized underlayment)
- Choose the right flooring type (engineered hardwood recommended for concrete)
- Select an installation method:
- Glue-down (direct adhesion to concrete)
- Floating (click-lock system over underlayment)
- Nail-down (requires wood subfloor over concrete)
Installing beautiful hardwood flooring over a cold concrete slab transforms your home, replacing the industrial feel of concrete with the natural warmth of hardwood. While this project requires careful moisture management, the results are worth the effort.
Concrete slabs present special considerations that don’t exist with traditional wood subfloors. Moisture can migrate through concrete and damage your new hardwood if proper preparations aren’t made.
With the right approach, you can successfully install hardwood floor on concrete in virtually any home – even in basements and below-grade spaces where moisture concerns are highest.
I’m Christopher Talty, owner of KT Flooring, and I’ve been helping homeowners install hardwood floor on concrete throughout New Hampshire and Massachusetts for over five decades, changing cold concrete spaces into beautiful, warm living areas with proper moisture testing and installation techniques.
Simple guide to install hardwood floor on concrete:
– Hardwood flooring installation NH
– Hardwood floor refinishing services
– average cost to install hardwood flooring
Can You Really Put Hardwood on Concrete? Myth-Busting Facts
Yes, you absolutely can install hardwood floor on concrete – but there’s more to the story. Unlike traditional installations over wood subfloors, concrete is naturally porous and permeable, which means ground moisture can make its way through the slab and potentially damage your new hardwood floors without proper precautions.
Over 90% of hardwood flooring failures stem from moisture issues. This highlights why proper preparation is essential when working with concrete. With the right approach, hardwood installed over concrete can be just as stunning and durable as any other installation.
According to the National Association of Realtors, homes with hardwood floors significantly outperform in the market:
– 99% of real estate agents find homes with hardwood sell easier
– 82% report these homes sell faster
– 90% believe hardwood floors can boost selling prices by up to 10%
Solid vs. Engineered Suitability
When it comes to concrete installations, not all hardwood options perform equally:
Engineered Hardwood is the star performer over concrete. These boards feature multiple plywood layers topped with a genuine hardwood veneer, making them resistant to humidity fluctuations. You can install engineered hardwood using any method—glue-down, floating, or nail-down (with a subfloor)—and they’re suitable for below-grade spaces like basements.
Solid Hardwood presents more challenges. These traditional 3/4″ thick planks are more vulnerable to moisture and humidity changes. You can’t install solid hardwood directly on concrete—you’ll need either a plywood subfloor or a sleeper system. They’re generally not recommended for below-grade installations.
At KT Flooring, we’ve found that engineered hardwood typically delivers the most reliable performance for concrete installations, especially in New England where seasonal humidity swings can be dramatic. If you prefer solid hardwood, we can install the proper subfloor systems to make it work beautifully.
Moisture & Humidity Basics
Understanding moisture dynamics is crucial before you install hardwood floor on concrete. Concrete, despite its solid appearance, is permeable. Ground moisture can migrate upward through the slab toward your flooring—a process that continues even in slabs that have been in place for decades.
Before installation, you need to know some critical moisture thresholds. Newly poured concrete slabs require at least 30-60 days of curing time before installation. Your concrete’s moisture emission rate should measure under 3 pounds per 1,000 square feet over 24 hours, and the relative humidity (RH) in the slab should typically fall below 75%.
The location of your concrete slab significantly impacts moisture concerns. Above-grade slabs present the least moisture worry. On-grade slabs have moderate moisture concerns. Below-grade installations face the highest moisture challenges and require the most careful preparation.
Don’t be fooled by a slab’s age—even concrete that’s been in place for decades can still transmit moisture. That’s why proper testing is essential before you install hardwood floor on concrete.
For a deeper dive into the science of concrete moisture testing, check out this scientific research on concrete moisture testing that explains the technical aspects in accessible terms.
Preparing the Slab: Test, Dry, Level, Protect
Proper concrete preparation is the foundation of a successful hardwood installation. This multi-step process ensures your concrete is ready to receive hardwood flooring:
- Clean thoroughly: Remove all paint, adhesives, sealers, and debris from the concrete surface
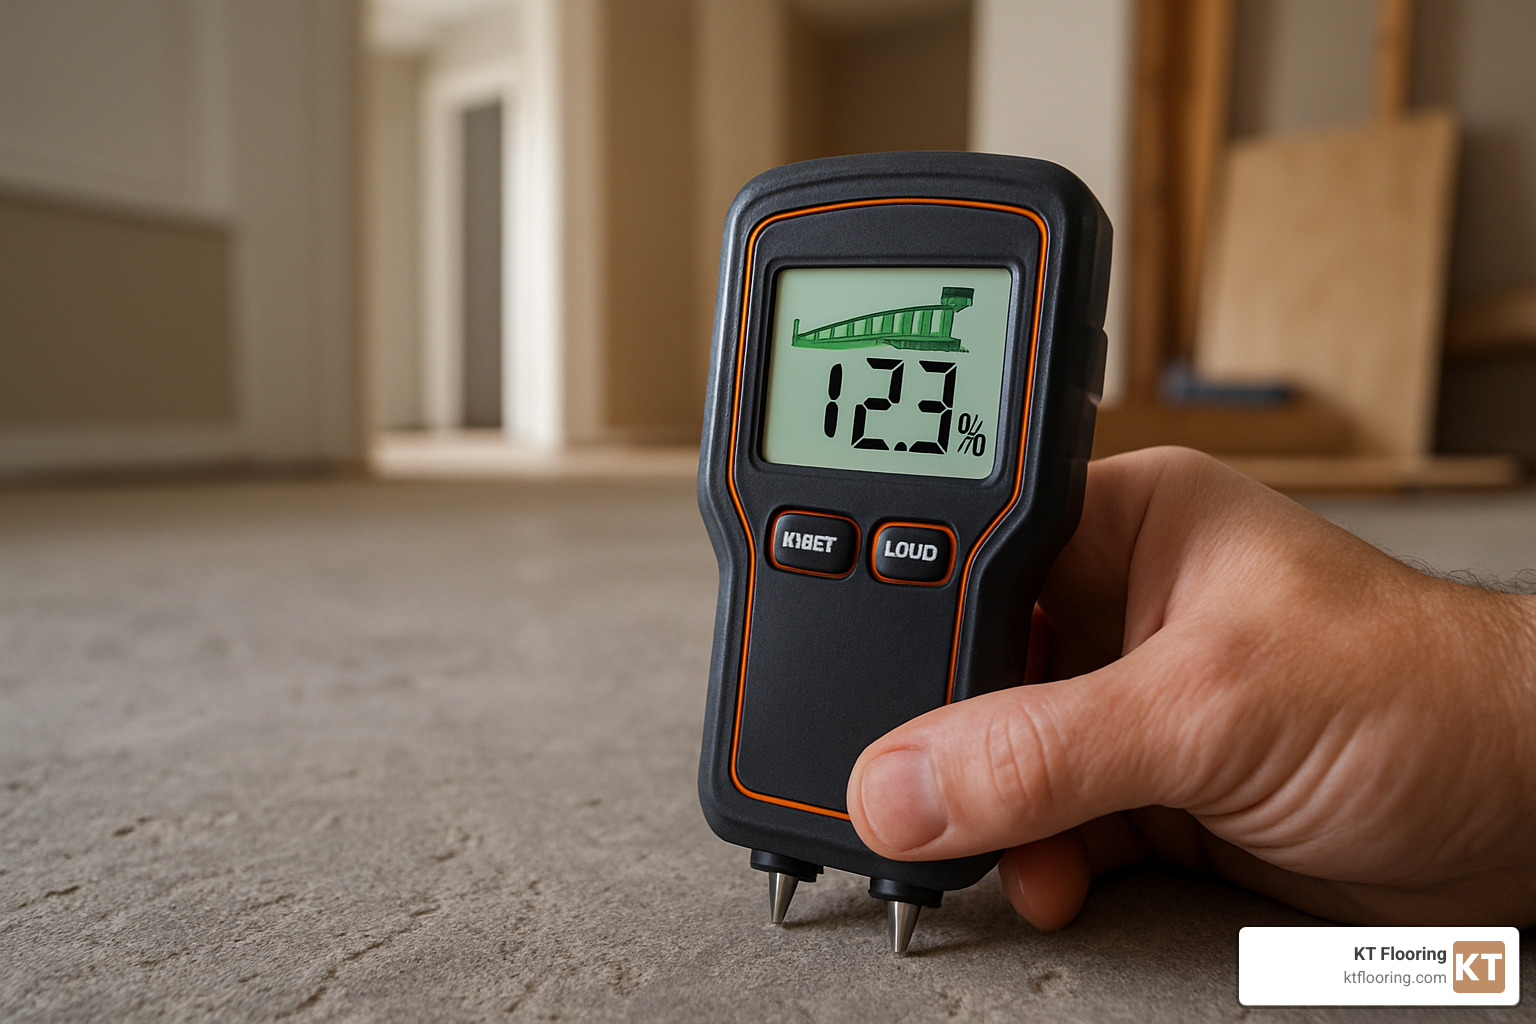
- Test for moisture: Use scientific methods to quantify moisture levels
- Level the surface: Grind high spots and fill low areas
- Install moisture protection: Apply appropriate moisture barriers
Moisture Testing Methods:
1. Calcium Chloride Test: Measures moisture vapor emission rate (MVER)
2. Relative Humidity Testing: Uses in-slab sensors to measure internal moisture
3. Moisture Meter: Provides quick surface readings
4. Plastic Sheet Test: Simple DIY method (less accurate but better than nothing)
The National Wood Flooring Association (NWFA) recommends using multiple test methods at various locations across your slab.
Leveling Requirements:
– NWFA standards require flatness within 3/16″ over 10 feet or 1/8″ over 6 feet
– High spots can be ground down with a concrete grinder
– Low spots should be filled with self-leveling compound
– Cracks must be repaired with appropriate concrete patching materials
A level surface prevents stress points that can damage your hardwood over time.
Moisture Barrier Options
Once your concrete is clean, dry, and level, you’ll need to install a moisture barrier before you install hardwood floor on concrete. Options include:
Polyethylene Film:
– 6-mil thickness minimum (some professionals recommend 8-10 mil)
– Seams should overlap 4-6 inches and be taped
– Extends up walls 2-3 inches (creating a “bowl” effect)
– Most economical option
Asphalt Felt Paper:
– Traditional 15-lb building paper
– Often used with asphalt mastic adhesive
– Provides both moisture protection and sound dampening
– Typically used in sleeper system installations
Liquid Membrane Systems:
– Applied like paint directly to concrete
– Creates seamless moisture barrier
– Often combined with crack-isolation properties
– More expensive but highly effective
Combination Systems:
– Specialized underlayments with built-in moisture barriers
– Often include sound-dampening properties
– Simplifies installation process
For most residential installations, a quality 6-mil polyethylene film with properly taped seams provides excellent protection.
Acclimating Wood Before You “Install Hardwood Floor on Concrete”
Wood is hygroscopic – it absorbs and releases moisture based on environmental conditions. Proper acclimation is essential before you install hardwood floor on concrete to prevent future problems.
Acclimation process:
1. Maintain installation room at normal living conditions (65-75°F, 30-55% humidity)
2. Stack hardwood with spacers to allow air circulation around all boards
3. Keep stacks away from exterior walls, direct sunlight, and HVAC vents
4. Monitor moisture content until it stabilizes
Acclimation time varies:
– Engineered hardwood: 2-3 days minimum
– Solid hardwood: 5-7 days minimum
– Wider planks (5″+ wide): May require longer acclimation
Choosing Products & Methods: Glue-Down, Floating, Nail-Down

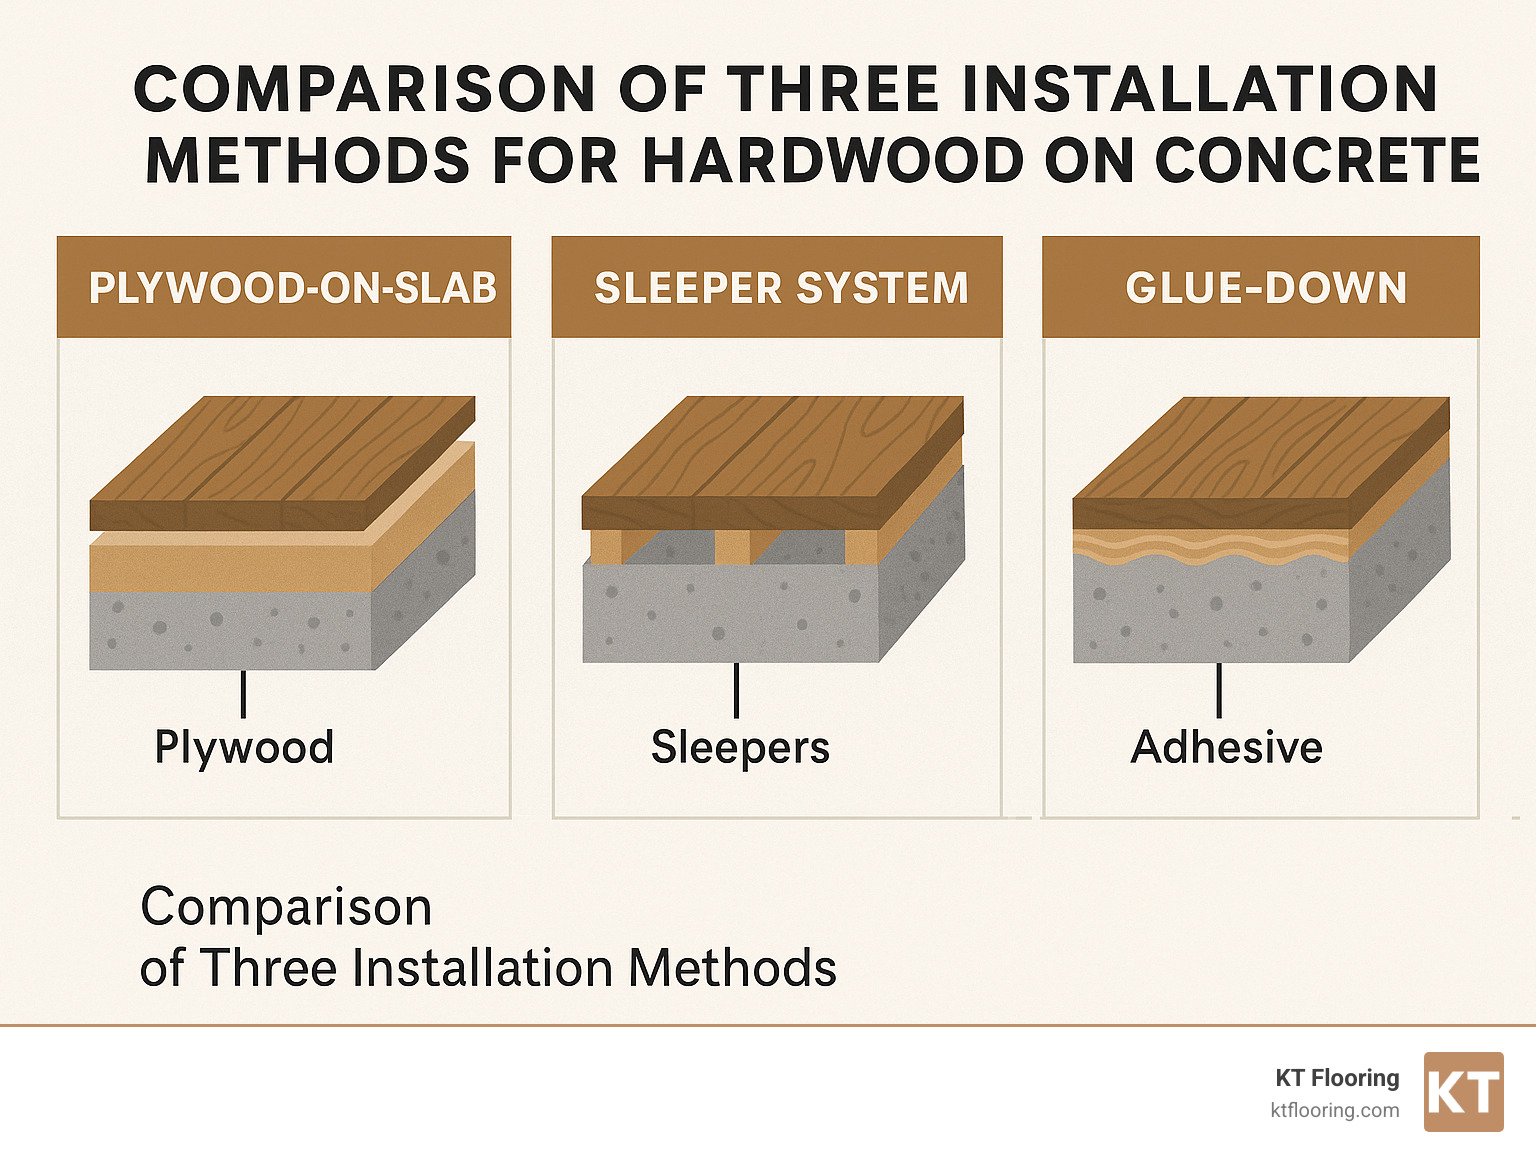
Concrete doesn’t limit your design choices, but it does affect HOW the floor is attached. Think of these three methods as tools in the toolbox—pick the one that fits your space and budget:
• Glue-Down – Creates the firmest feel underfoot and the lowest profile (great where door clearance is tight). Modern urethane adhesives double as moisture barriers, but the slab must be spotless and flat. Best for high-traffic living areas.
• Floating – Boards lock to each other, not to the slab. Installation is fast, DIY-friendly, and forgiving of minor slab imperfections. Mandatory perimeter expansion gaps mean you may hear a slight “click” sound when you walk, but most homeowners never notice after furniture is in place.
• Nail-Down over Sleepers/Plywood – The classic hardwood experience. A sleeper or plywood system is first anchored to the slab, then solid or engineered boards are nailed on top. Feel and repairability are excellent, but the added height can require trimming doors and transitions.
| Method | Works With | Typical Height Gain | DIY Difficulty | Best Use Case |
|---|---|---|---|---|
| Glue-Down | Engineered | 1/4–3/8″ | Moderate | Main floors, condos |
| Floating | Engineered | 3/8–1/2″ | Easy | Basements, quick renos |
| Nail-Down | Solid & Engineered | 3/4–1-1/2″ | Hard | Historic look, tall ceilings |
Step-by-Step Guide: Install Hardwood Floor on Concrete Like a Pro
The exact steps change slightly with each method, but the framework is the same.
1. Final Slab Check & Moisture Barrier
Take fresh moisture readings, vacuum thoroughly, then put down your barrier:
– Glue-down: trowel adhesive with built-in vapor protection.
– Floating: roll out underlayment with taped seams, 2–3″ up the walls.
– Nail-down: 6-mil plastic under sleepers or plywood.
2. Layout & Starter Rows
Snap a chalk line in the direction you want the boards to run (usually toward the biggest window). Rack 3–4 rows loosely to balance colors and lengths, keeping 1/2″ expansion gaps at walls.
3. Secure the Boards
• Glue-Down: Spread adhesive for 2–3 rows, lay boards, tape seams so nothing drifts.
• Floating: Angle-lock or glue the tongues, tap tight with a block, use spacers at walls.
• Nail-Down: Face-nail the first row, then blind-nail with a flooring nailer every 6–8″.
4. Roll, Cure, Walk-Through
For glue-downs, roll the floor with a 100-lb roller within an hour. Stay off the surface 24 h, delay rugs 7–14 days. Finally, add baseboards and transitions, then invite everyone in to admire the new space!
Tools, Materials & Average Cost Breakdown
The concrete subfloor means a few extra rentals—moisture meter, concrete grinder or self-leveler tools, and a 100-lb roller for glue-downs. Most homeowners rent these for $50–300 total.
Main material costs (average internet data, NOT KT Flooring prices):
| Item | Low | Typical | High |
|---|---|---|---|
| Engineered hardwood | $3 / sq ft | $6 / sq ft | $15 / sq ft |
| Solid hardwood (needs sleepers) | $5 | $9 | $20 |
| Moisture barrier / underlayment | $0.50 | $1 | $2 |
| Urethane adhesive | $0.75 | $1.25 | $2 |
| Plywood or sleeper system | $1.50 | $2.50 | $4 |
| Professional labor | $4 | $7 | $12 |
All-in, projects generally fall between $8 and $45 per square foot installed once prep work is factored in.
Hidden extras that move the needle: extensive slab leveling ($2–7 / sq ft), old-floor removal ($1–3 / sq ft), and door or baseboard adjustments. Planning for these avoids budget surprises.
Maintenance, Common Mistakes & When to Call a Pro
A broom, a damp (not wet) mop, and felt pads under furniture are 90 % of hardwood care. Keep your home between 30–55 % humidity and wipe spills fast—your floor can easily last 50 + years.
5 Mistakes to Dodge
- Skipping moisture tests.
- Rushing acclimation.
- Forgetting 1/2″ expansion gaps.
- Wrong adhesive for slab conditions.
- Installing over an unlevel slab.
When the Pros Earn Their Keep
Call KT Flooring if you’re seeing high moisture readings, planning below-grade installs, or need solid hardwood over concrete. Our Hudson, NH team services Southern NH, Northeast MA, and the Greater Boston area with free in-home consultations.
Frequently Asked Questions about Hardwood on Concrete
What moisture readings are safe before installation?
Moisture is the invisible enemy when it comes to hardwood flooring on concrete. For a successful installation, your concrete should meet these moisture benchmarks:
– Calcium chloride test: Readings below 3 lbs/1000 sq.ft./24h
– Relative humidity test: Keep it below 75% RH for most installations
– Moisture meter comparison: Your concrete shouldn’t read more than 4% different from your wood flooring
These are general guidelines. Always check your specific flooring manufacturer’s recommendations. When in doubt, err on the side of extra protection. A few more dollars spent on moisture mitigation now saves thousands in potential repairs later.
Do I need underlayment if I glue the floor?
With glue-down installations, the adhesive typically pulls double-duty as both your bonding agent and moisture barrier when applied correctly. Modern urethane adhesives create a protective membrane between your concrete and hardwood.
That said, there are situations where a separate moisture barrier makes sense even with glue-down installations:
- If your slab has known moisture issues (readings near the upper limits)
- Below-grade installations like basements often benefit from additional moisture barriers
- Some older homes with concrete poured before vapor barriers were standard practice might need extra protection
The most important factor? Your warranty. Some manufacturers will only honor their guarantees if you use their specific system, which might include separate barriers even with adhesive.
Can radiant heat be used under hardwood on concrete?
Yes! Radiant heat systems can absolutely work with hardwood over concrete, but you’ll need to follow some important guidelines to ensure success.
Engineered hardwood is your best friend for radiant heat applications. Its cross-layered construction provides dimensional stability that solid hardwood simply can’t match under temperature fluctuations.
Your heating system must include a programmable thermostat with temperature limitations – never exceed 85°F surface temperature. Before we install hardwood floor on concrete with radiant heat, we’ll run your system for at least 5-7 days to work out any moisture and stabilize the environment.
Some practical tips: avoid extremely wide planks (over 7″) as they’re more prone to gapping with temperature changes. And be cautious with certain species like maple and beech, which tend to be less stable with fluctuating temperatures.
For radiant heat systems, we typically recommend either glue-down or floating installations. Nail-down over sleepers creates air gaps that reduce heating efficiency and can lead to uneven warming of your floors.
Conclusion
There’s something magical about changing a cold, concrete floor into a warm, inviting hardwood space. While the journey requires careful planning, the destination – that beautiful hardwood floor – makes every step worthwhile.
Let’s recap what we’ve learned about how to install hardwood floor on concrete successfully:
Moisture is your primary challenge. Proper testing and barrier installation aren’t optional steps – they’re your insurance policy against future headaches and costly repairs.
Engineered hardwood typically performs best on concrete. Its layered construction provides stability against moisture fluctuations that would cause solid hardwood to warp or cup. With proper subfloor systems, even traditional solid hardwood can thrive over concrete.
Your installation method matters tremendously. Whether you choose glue-down for its stability, floating for its DIY-friendliness, or nail-down for traditional solid hardwood, each approach has specific benefits for different situations.
Never rush the preparation steps. Proper acclimation and concrete prep might feel tedious, but they’re the foundation of a successful installation.
When in doubt, professional installation often provides peace of mind. While some homeowners successfully tackle floating floor installations themselves, the complexity of concrete preparation and moisture management often benefits from experienced hands.
At KT Flooring, we’ve been helping homeowners throughout New Hampshire and Northeast Massachusetts install hardwood floor on concrete for over five decades. We’ve seen how our New England climate and building styles present unique challenges – and we’ve developed specialized techniques to ensure your hardwood installation remains beautiful for generations.
Whether you’re finishing a basement to create a cozy family room, renovating a slab-on-grade ranch home, or upgrading a concrete-subfloor condo, our team brings the expertise to help you select the perfect hardwood and installation method for your unique space.
We’d love to help bring your vision to life with a free in-home consultation. Our service area covers communities throughout Southern New Hampshire and Northeast Massachusetts, including Manchester, Nashua, Hudson, Bedford, Concord, and the Greater Boston area.
More info about hardwood flooring
